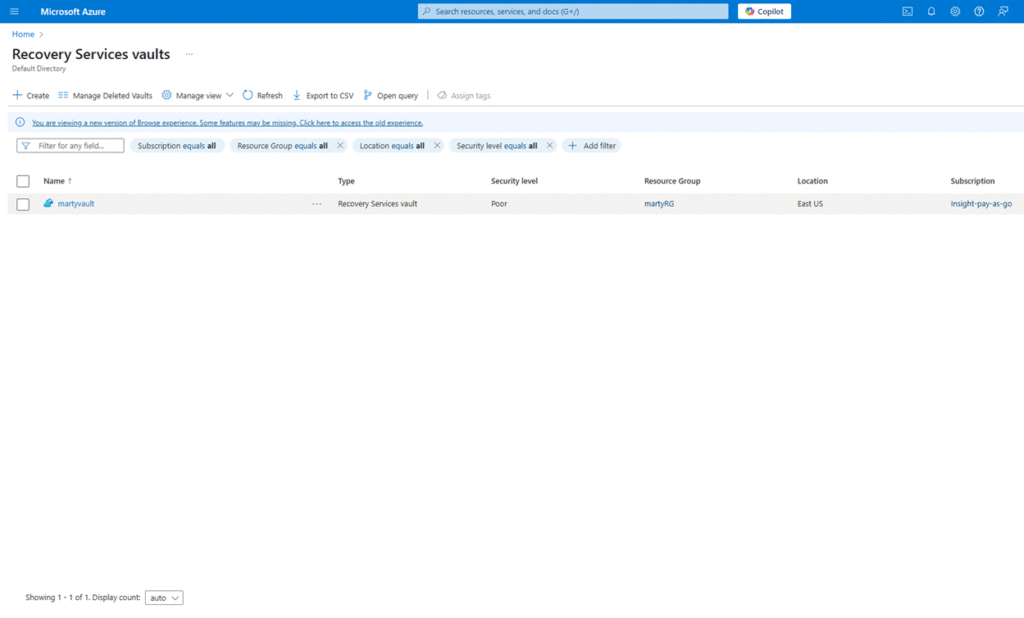
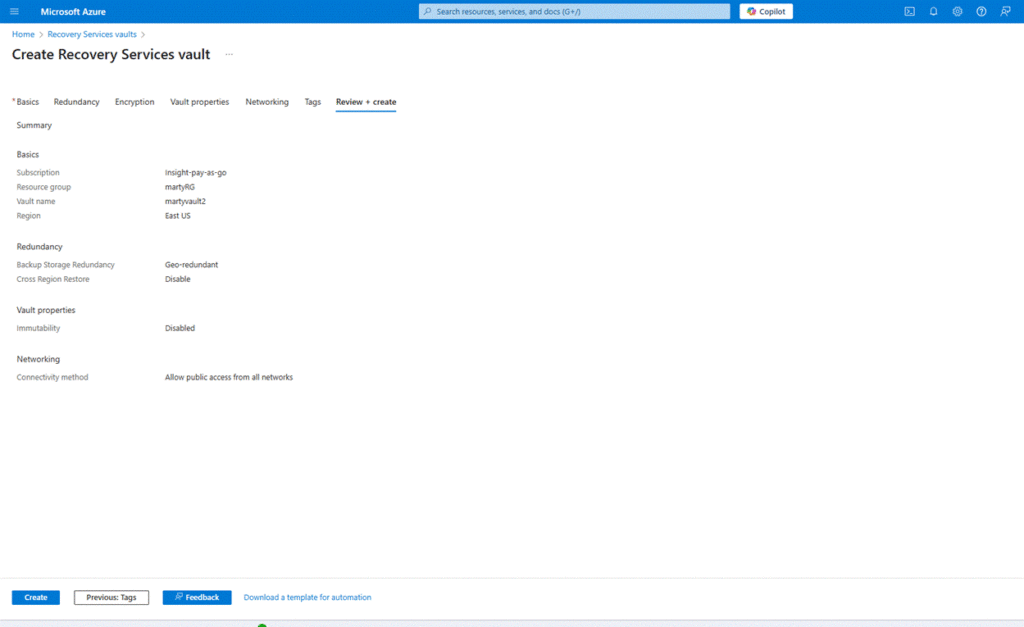
1. Open Azure Portal and Create a Recovery Services Vault
Go to the Azure Portal, search for “Recovery Services vault”, and click “Create”.
- Enter a name like martyvault
- Select your subscription and resource group (or create one)
- Choose the region where your source VM is located
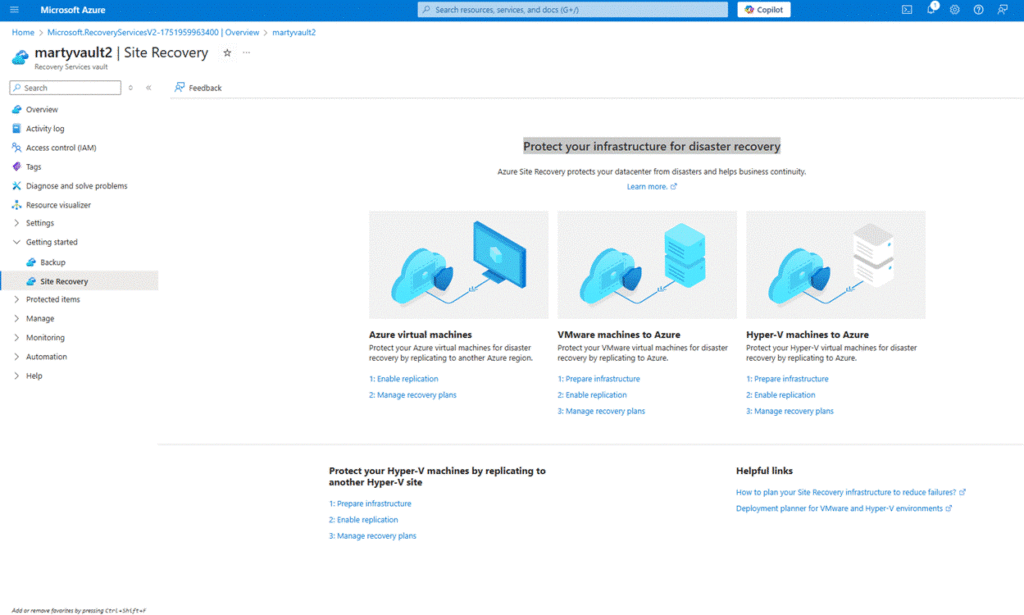
2. Enable Site Recovery for a VM
After the vault is created:
- Open martyvault
- Under Getting Started, click Site Recovery
- Under “Where is your workload running?”, choose Azure
- For target, also choose Azure
- Click Prepare Infrastructure
3. Select Source and Target Settings
- Source: Select subscription, resource group, and the VM you want to protect ( martyvm)
- Target: Select target region, subscription, and create or select a new resource group for failover
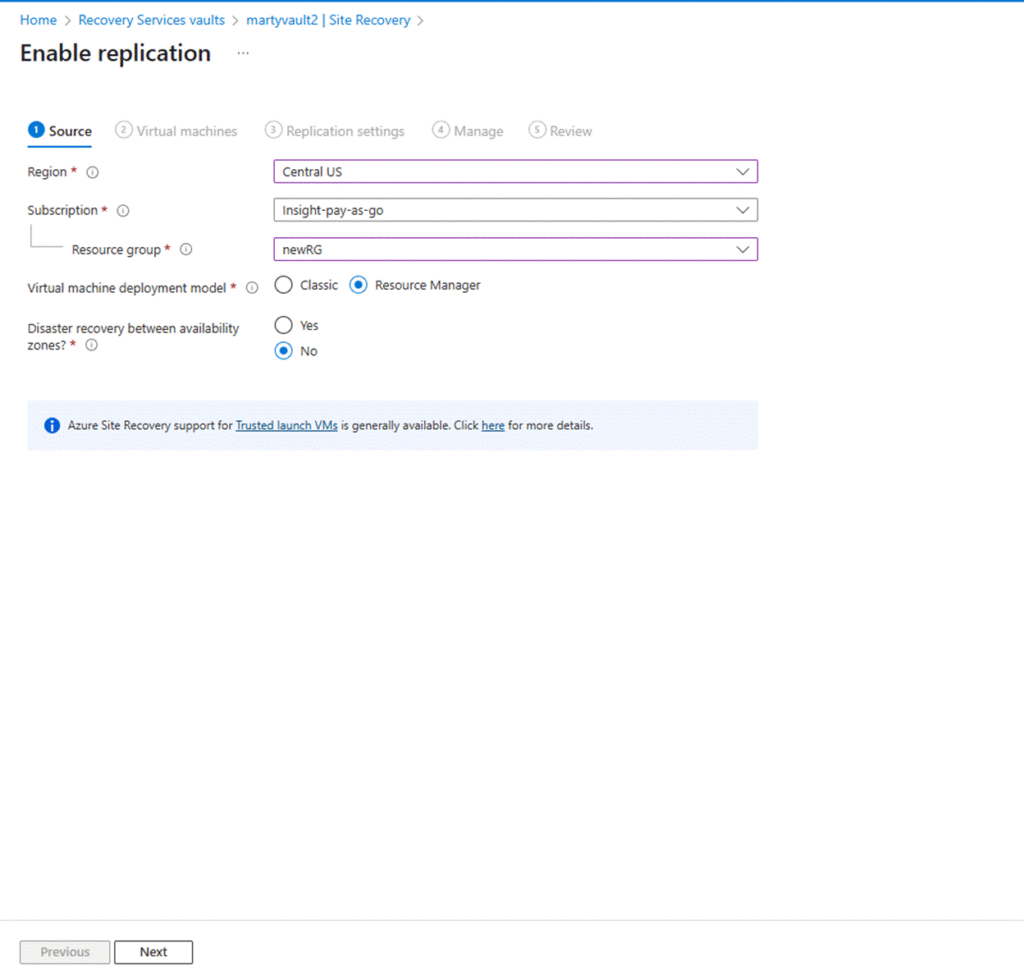
4. Configure Replication Settings
- Select a storage account for replication (or create a new one)
- Use default replication policy or customize if needed
- Confirm settings and click Enable replication
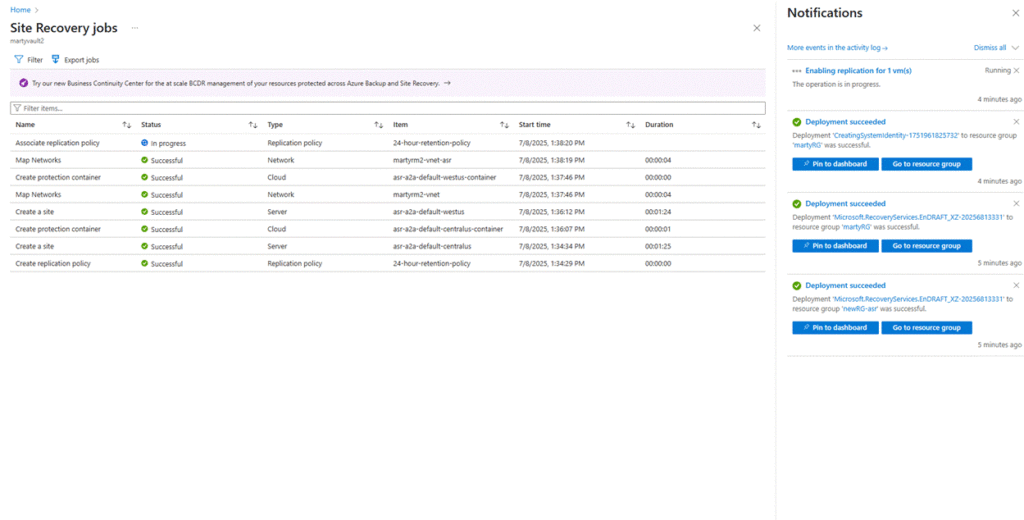
5. Monitor Replication Progress
- Go to Site Recovery Jobs in the vault to monitor progress
- Once replication completes, you’ll see the VM under Replicated Items
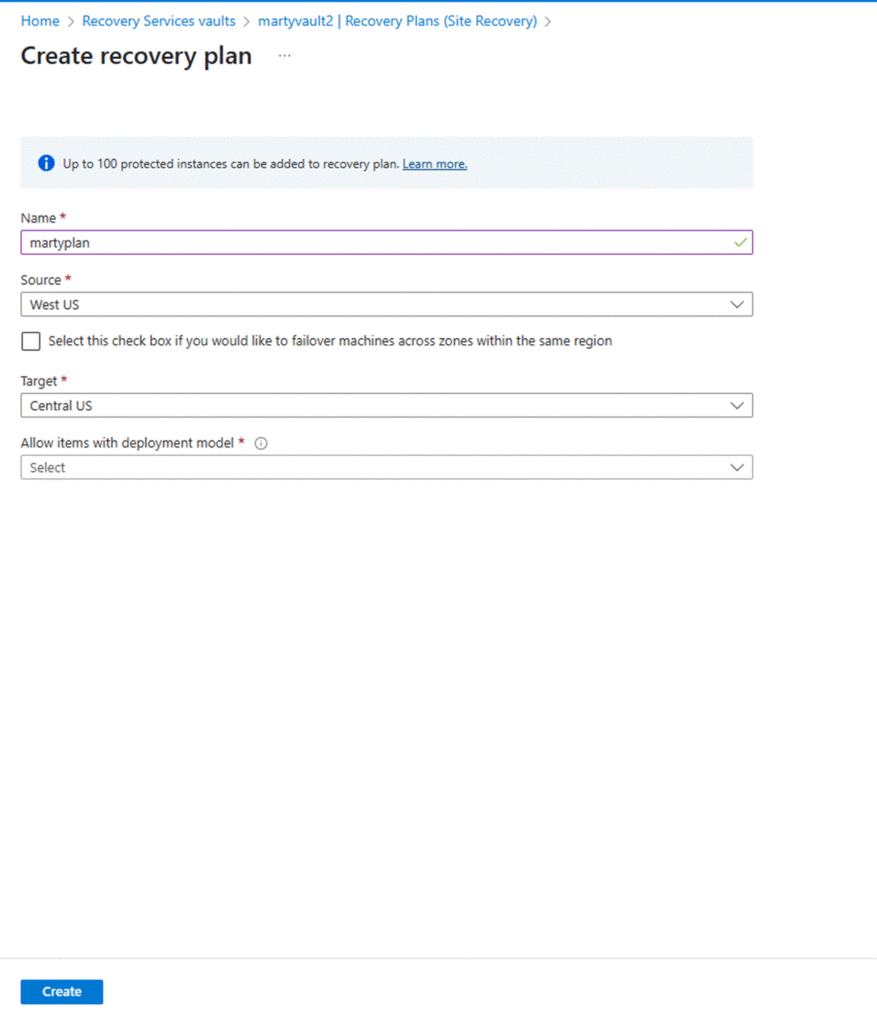
6. Create a Recovery Plan (Basic)
- In the vault, go to Recovery Plans > + Recovery Plan
- Name it something like martyplan
- Select source region and replicated items ( martyvm)
- Click Create
7. Test the Recovery Plan
- Select the recovery plan (martyplan)
- Click Test Failover and choose a test network
- Monitor the job and verify test environment spins up correctly
#Migration #CloudMigration #Azure #M365Migration #EmailMigration