In the past; getting a new server setup was quite a task and time consuming. From placing an order for a server to having it accessible on the local LAN; this process would take weeks….even MONTHS to complete this work. Now, with Azure, you have options that take this multi-week task and accomplish the same operational environment in only a few hours in 1 day in 1 week!
To prevision a server, one must complete the following:
Step 1: Sign-in to Azure Portal
- Navigate to https://portal.azure.com
- Sign in to Azure using your credentials
Step 2: Create a Virtual Machine
- In the left-hand side menu, click .
- Select ‘Virtual Machine’ in ‘Compute’.
Step 3: Configure the Basic Settings
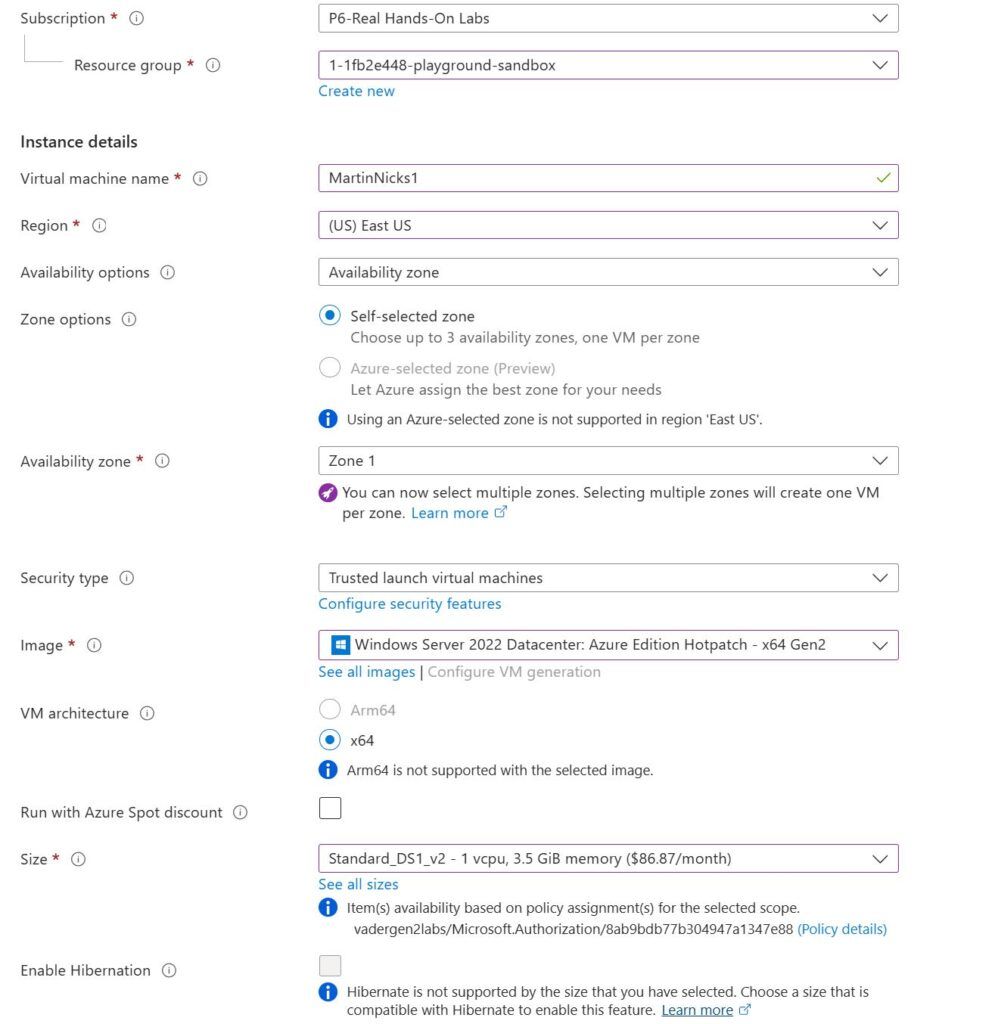
- Subscription: Choose your Azure subscription.
- Resource Group: Choose an existing group of resources or create one.
- Virtual Machine name: Enter a VM’s name.
- Region: Select the closest geographical area to you or users.
- Availability Options: Choose based on the high availability you require.
- Image: Select a OS image (e.g. Windows Server Ubuntu).
- VM Size: Choose the VM based your CPU, RAM requirements, and disk size.
- AuthenticationType: Select Password or SSH key public.
Step 4: Set Administrator Account
- For admin access you need to enter a username (or SSH key).
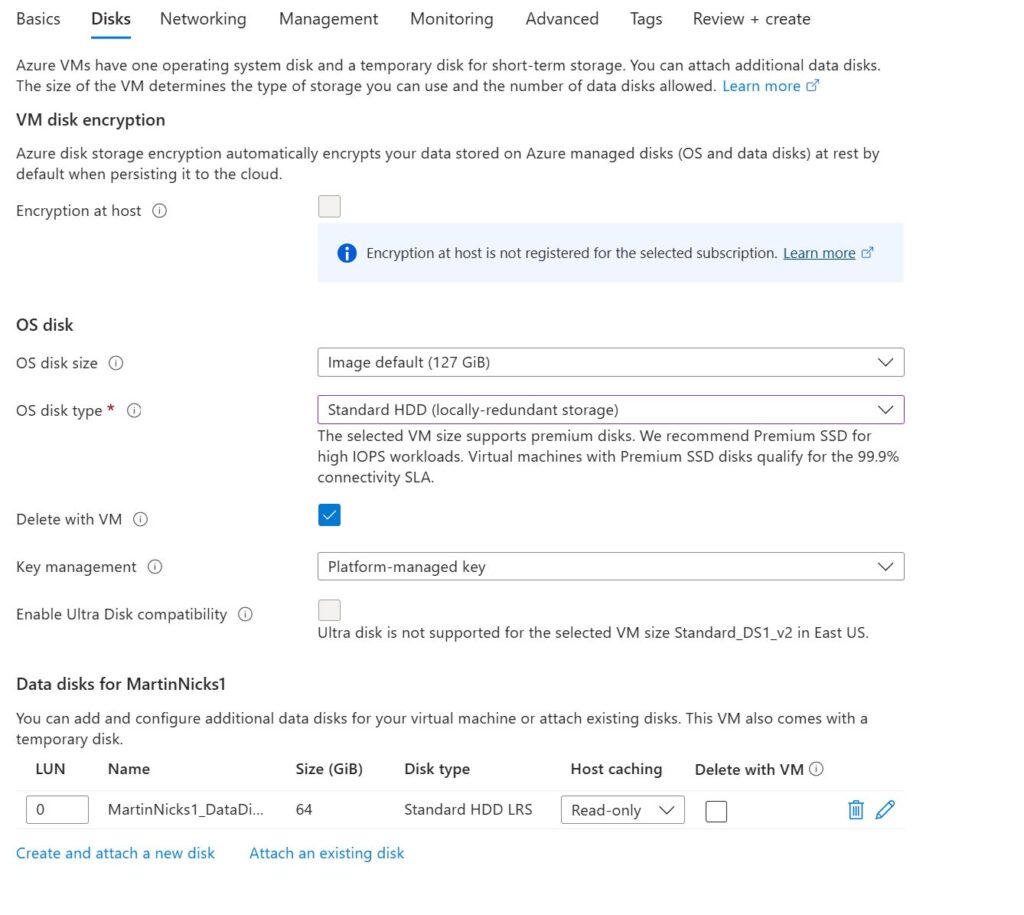
Step 5: Configure Disks
- Choose your OS disk type.
- Add data disks if needed.
Step 6: Configure your Networking
- Select or create your virtual network.
- Select or create your subnet.
- Enable or disable the Public IP Address.
- Configure Network Security Groups rules or leave defaults.

Step 7: Management, Advanced, Tags
- Configure monitoring options like boot diagnostics.
- Add tags to Resource Management.
- Set up advanced options as needed, for example extensions.
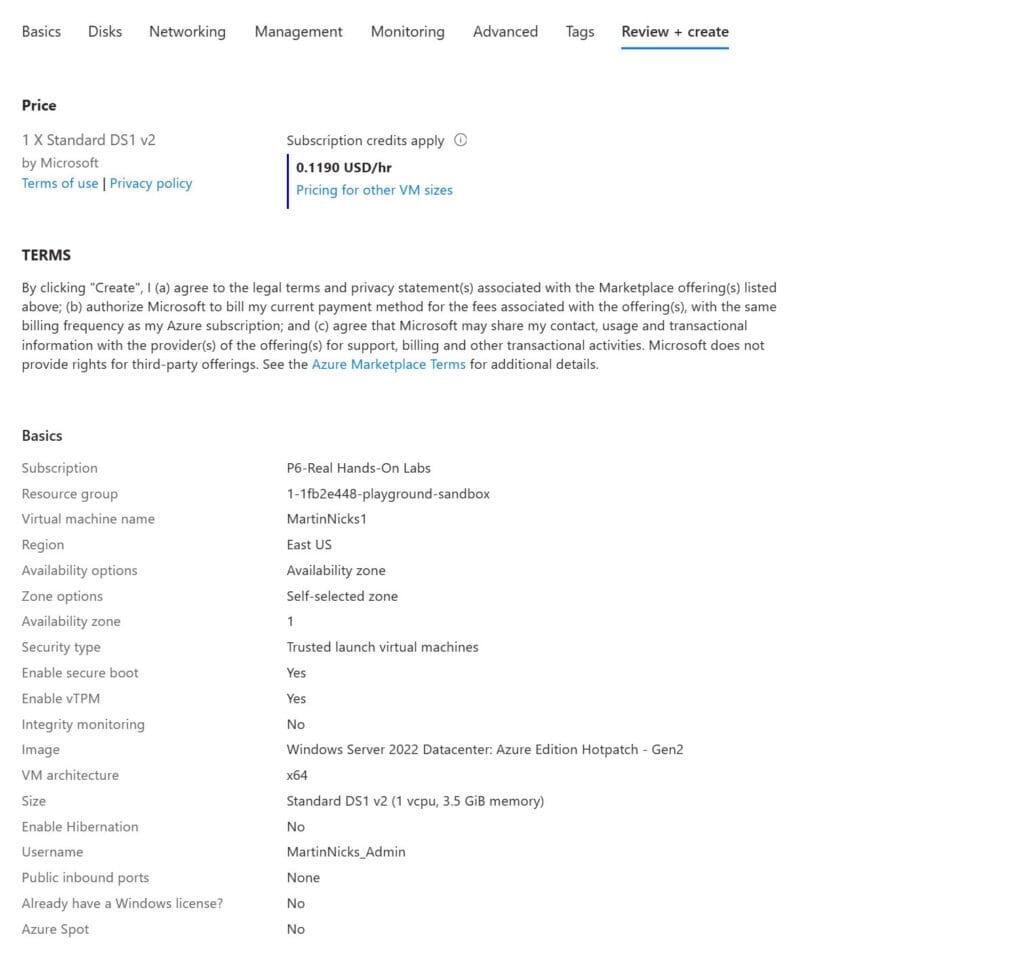
Step 8 Review + Create
- Review all settings
- Click on “Create“, to start provisioning.
Step 9 Deployment, Access and Configuration
Use SSH and the public IP Address for Linux
Wait for the deployment of the troops to be complete.
Once the VM has been deployed, you can connect to it as follows:
Use Remote Desktop Services (RDP).