1. Open Azure Portal and start resource creation
Go to the Azure Portal, click on “Create a resource”, and search for “Storage account” in the search bar.
2. Select Storage Account and begin setup
Click on “Storage account” from the search results, then click the “Create” button to begin the configuration.

3. Fill in the basic configuration
On the “Basics” tab:
- Select your subscription and resource group (or create a new one).
- Enter the storage account name.
- Choose the region, performance, and redundancy options.
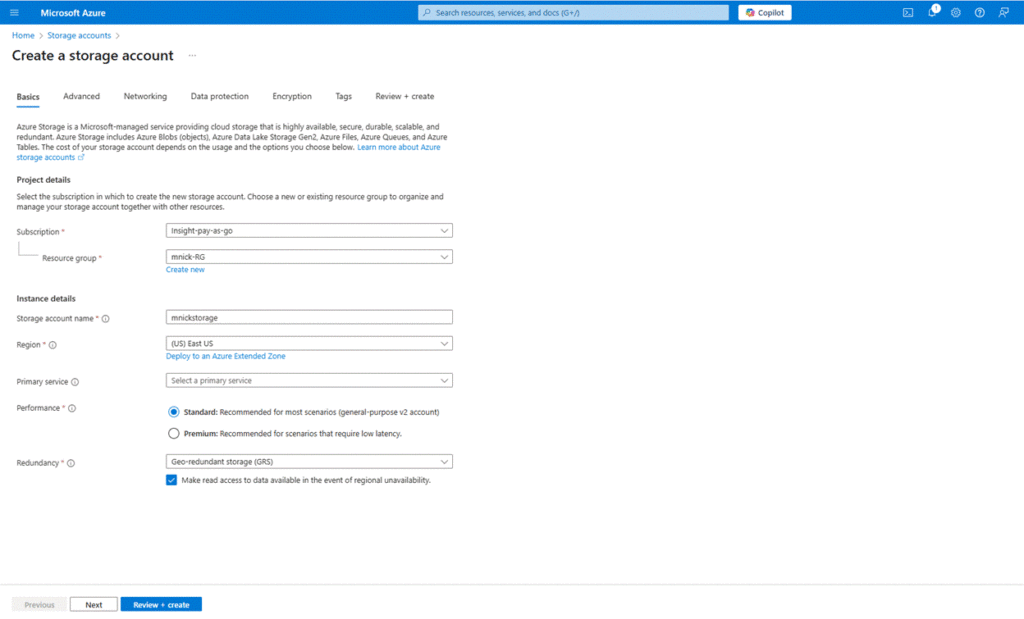
4. Review the remaining tabs (Advanced, Networking, Data Protection)
Go through each tab. You can leave most settings as default unless changes are needed.
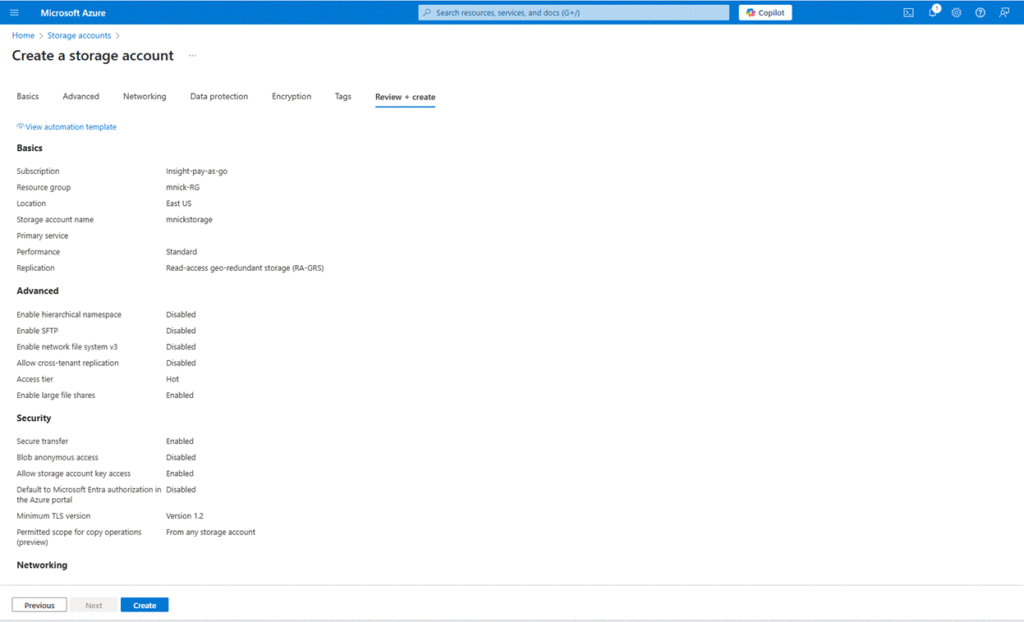
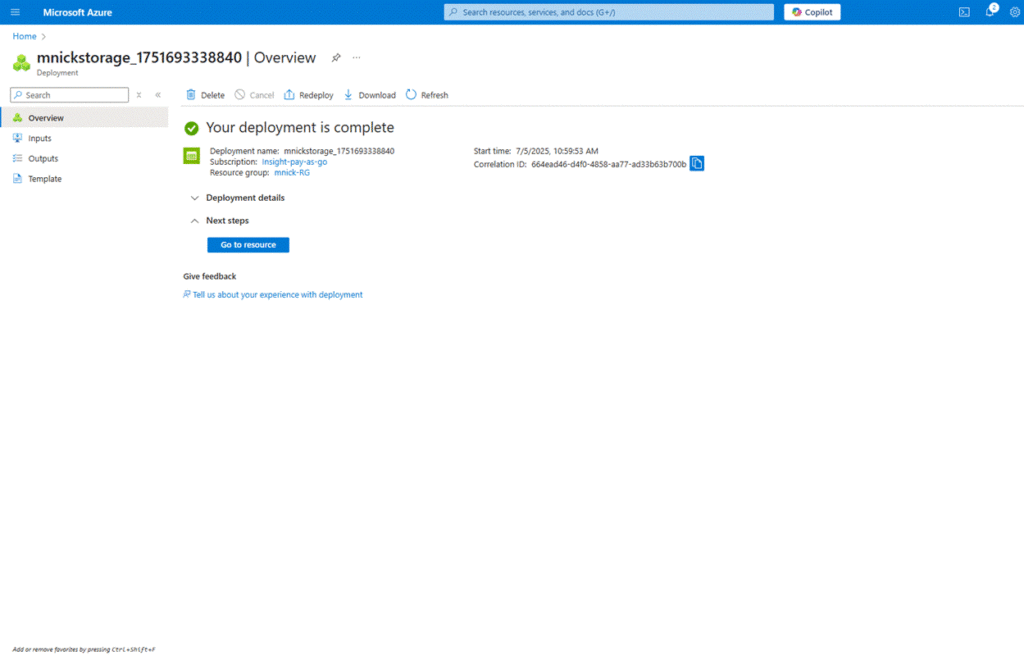
5. Review and Create
On the “Review + Create” tab, confirm that the validation has passed.
Click the “Create” button to deploy the storage account.

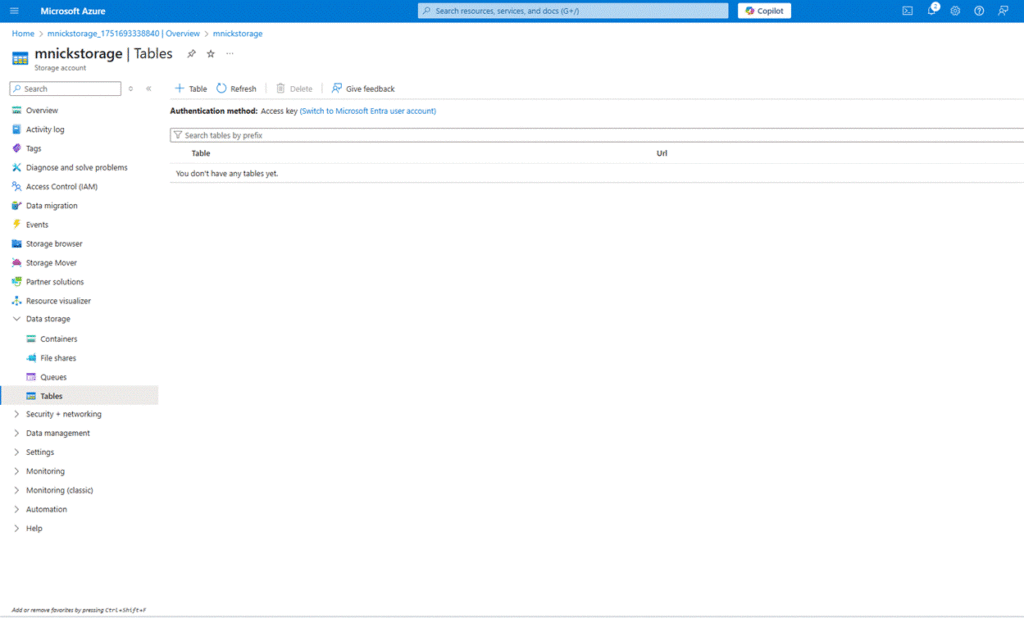
6. Additional Step for Table Storage access
Once the storage account is created:
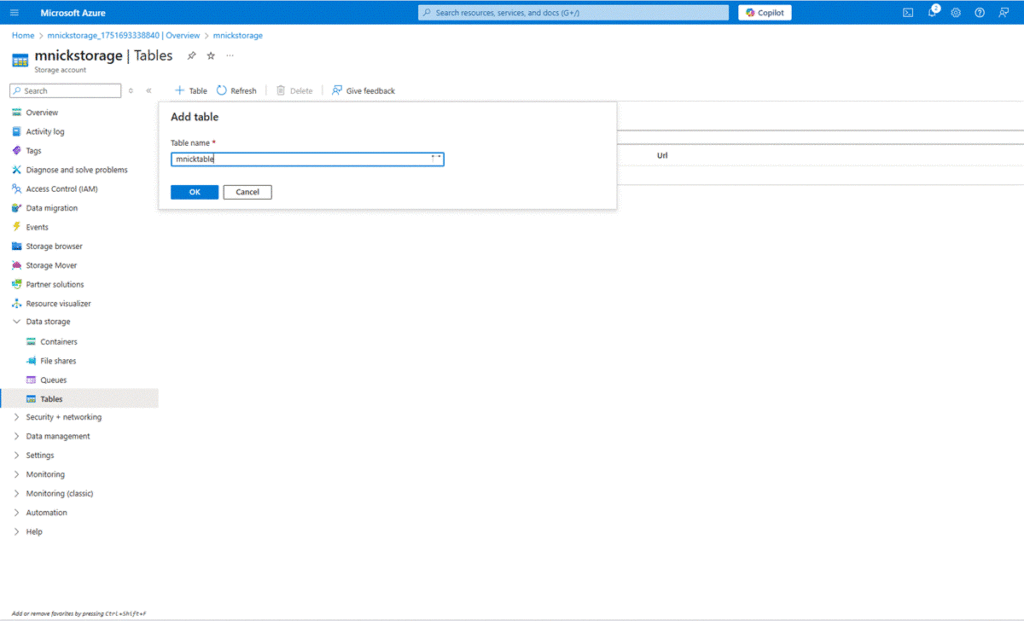
- Navigate to the “Tables” section under Data Storage in the left-hand menu of your storage account.
- Click “+ Table”, provide a name, and click OK.