1. Before We Get Started
Before creating the virtual server, make sure you have the following:
- Azure CLI installed on your local machine or VM.
- Azure Account to log in.
- Desired Location in Azure where you want to deploy the server (Marty-RG, eastus, westus).
2. Log in
Open the command prompt or terminal and run the following command to log in to your Azure account:
az login
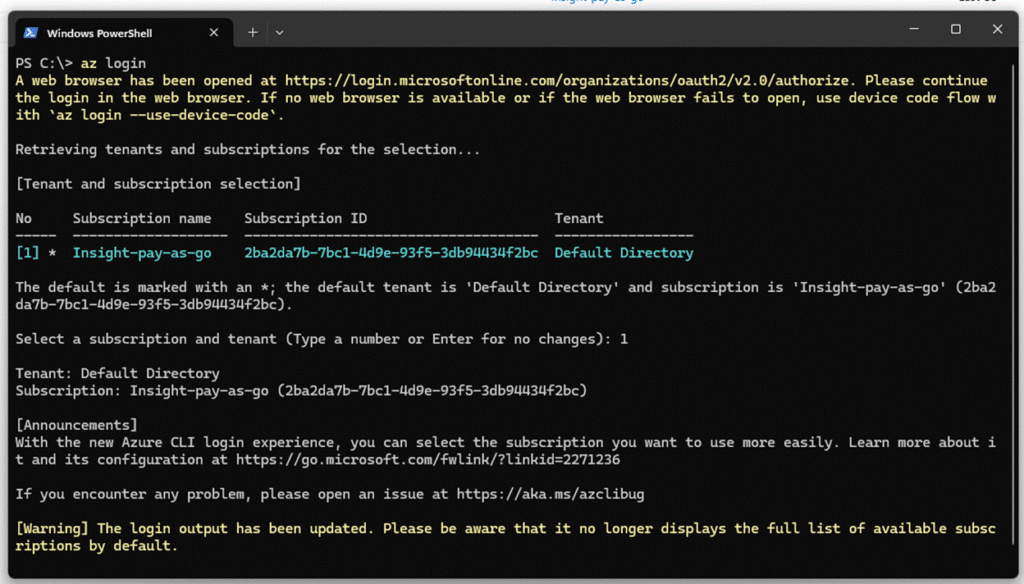
This will prompt you to authenticate your Azure account.
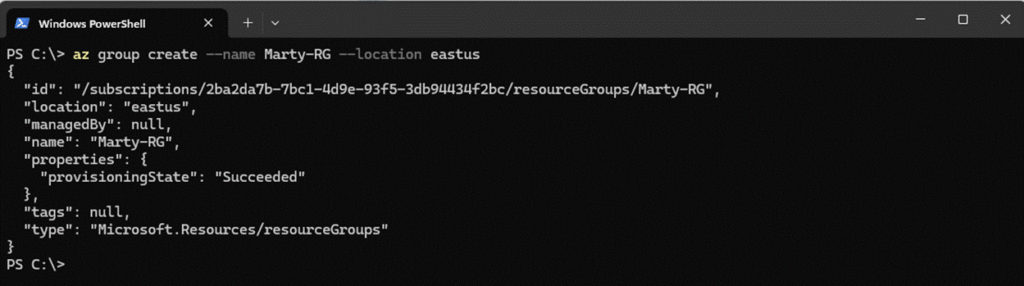
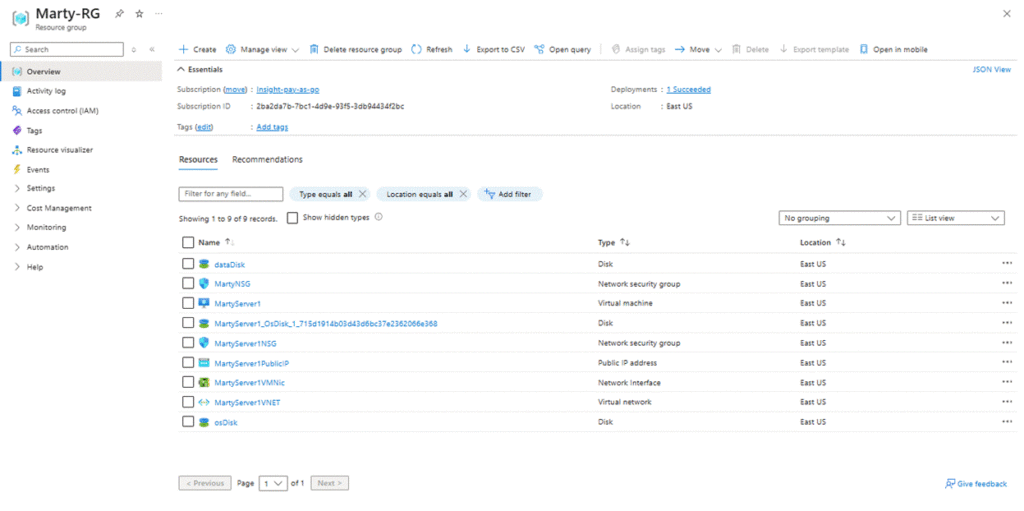
3. Create the Resource Group
Next, create a resource group called Marty-RG in your desired region. Replace <Location> with the region you want (eastus):
az group create –name Marty-RG –location eastus
4. Create the VM
Now, create the virtual machine MartyServer1 with 8 GB RAM, 4 CPUs, and Windows Server 2025. Use the following command, replacing <YourPassword> with your chosen password:
az vm create –resource-group Marty-RG –name MartyServer1 –image Win2025Datacenter –size Standard_D4s_v3 –admin-username azureuser –admin-password <YourPassword> –no-wait

5. Create the OS Drive (C Drive) with 100 GB
Create and attach the OS drive (C:) with 100 GB to your VM:
az vm disk attach –resource-group Marty-RG –vm-name MartyServer1 –name osDisk –size 100 –new

6. Create the Data Drive (D Drive) with 200 GB
Create and attach the data drive (D:) with 200 GB to your VM:
az vm disk attach –resource-group Marty-RG –vm-name MartyServer1 –name dataDisk –size 200 –new

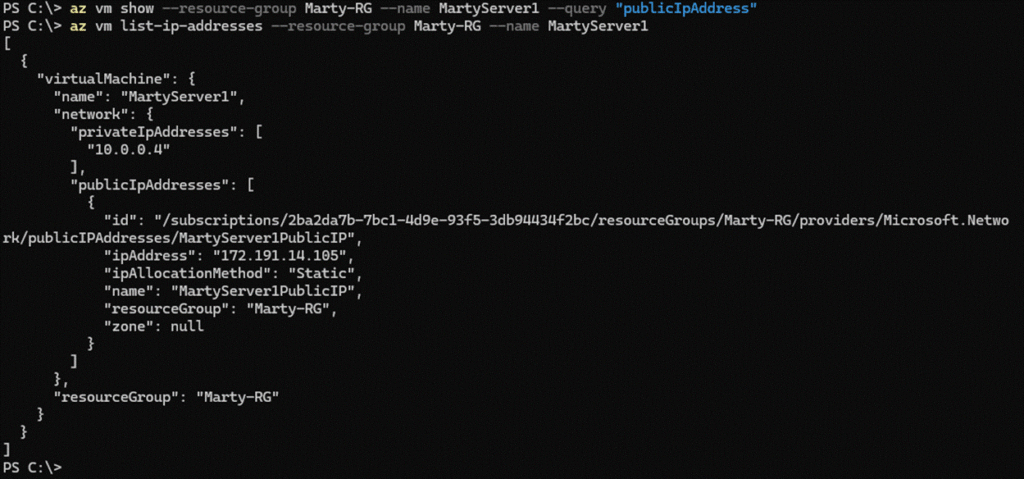
7. Retrieve the Public IP to Connect
To connect to your newly created VM, you can retrieve the public IP address by running:
az vm show –resource-group Marty-RG –name MartyServer1 –query “publicIpAddress”
az vm list-ip-addresses –resource-group Marty-RG –name MartyServer1
8. Set a Static IP (Optional)
If you want to ensure the IP address remains the same, set it as static:
az network public-ip update –ids <public-ip-id> –allocation-method static
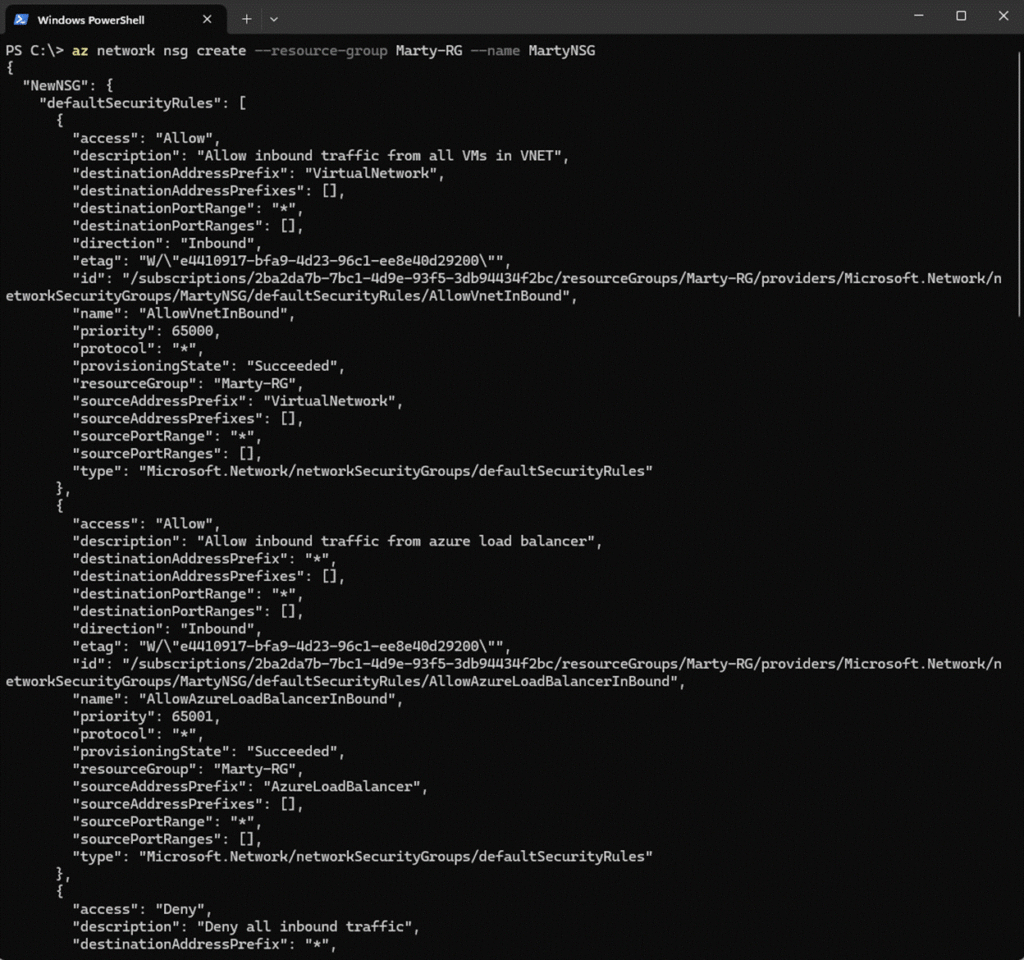
9. Create a Network Security Group (NSG) (Optional)
A Network Security Group (NSG) allows you to control access to your virtual machine. You can create one by running:
az network nsg create –resource-group Marty-RG –name MartyNSG
10. Attach the Network Security Group to the VM
To link the security group to your virtual machine’s network interface, use the following command:
az network nic update –resource-group Marty-RG –name <NICName> –network-security-group MartyNSG
You can now connect to your server using the public IP address and manage it remotely.
#Migration #CloudMigration #Azure #M365Migration #EmailMigration