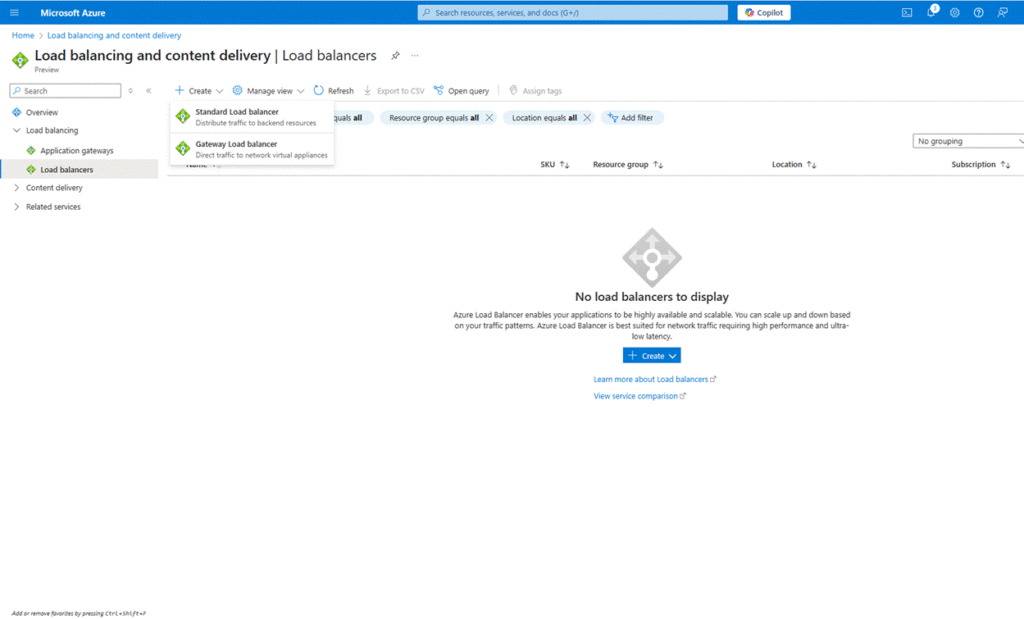
1. Open Azure Portal and start resource creation
Go to the Azure Portal, click on “Create a resource”, and search for “Load Balancer”.

2. Select Load Balancer and begin setup
Click on “Load Balancer” from the search results, then click the “Create” button to begin the setup.
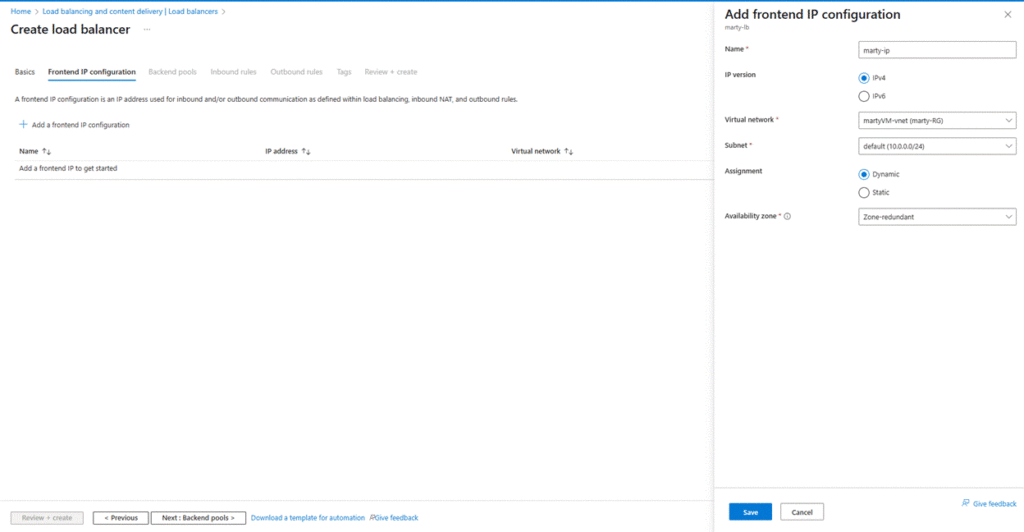
3. Fill in the basic configuration
On the Basics tab:
- Select your subscription and resource group (or create one).
- Enter the name, such as marty-lb.
- Select region and SKU ( Standard).
- Choose Public or Internal based on your requirement.
- For the public, select a public IP or create a new one (marty-ip).
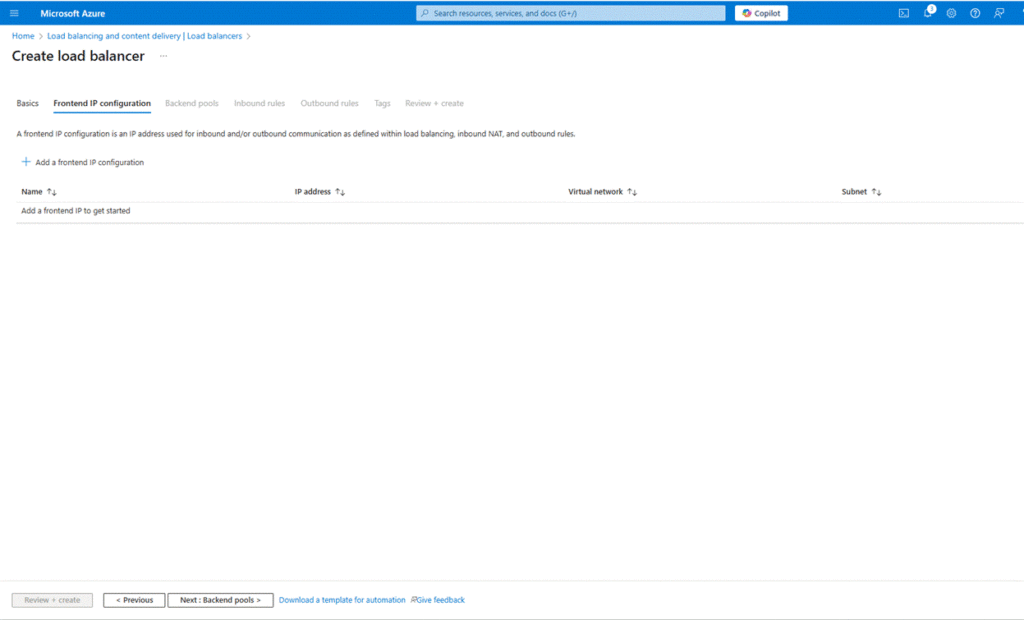
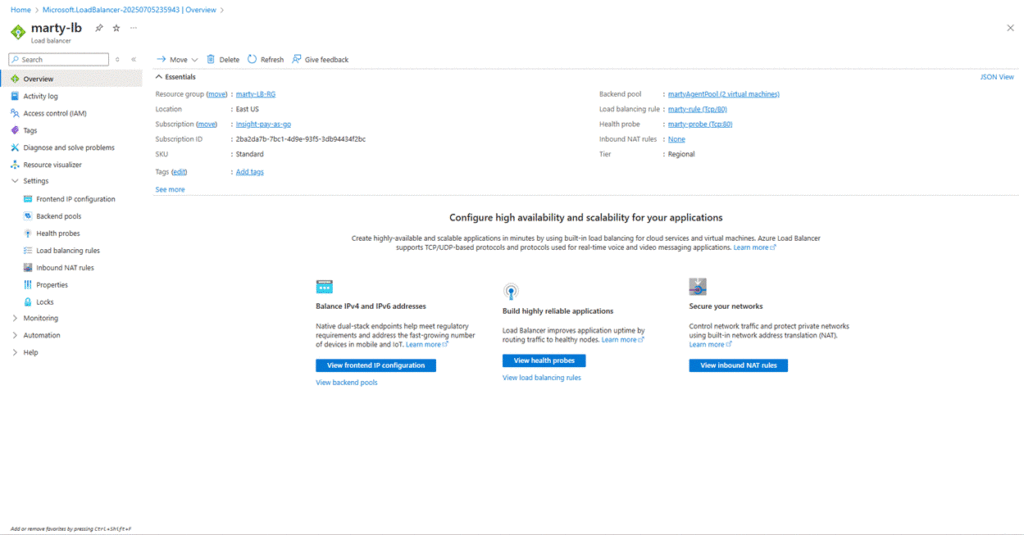
4. Configure frontend IP and backend pool
- On the Frontend IP Configuration tab, confirm the public IP is selected or configured.
- On the Backend Pools tab, add a new backend pool and associate it with virtual machine NICs ( marty-vm1, marty-vm2).
5. Configure load balancing rules
- Go to the Load Balancing Rules tab.
- Add a new rule ( marty-rule) that maps frontend port ( 80) to backend port (80), linked to the created probe.
6. Set up health probes
- Go to the Health Probes tab.
- Add a new probe ( marty-probe) for monitoring, using port 80 or another relevant port.
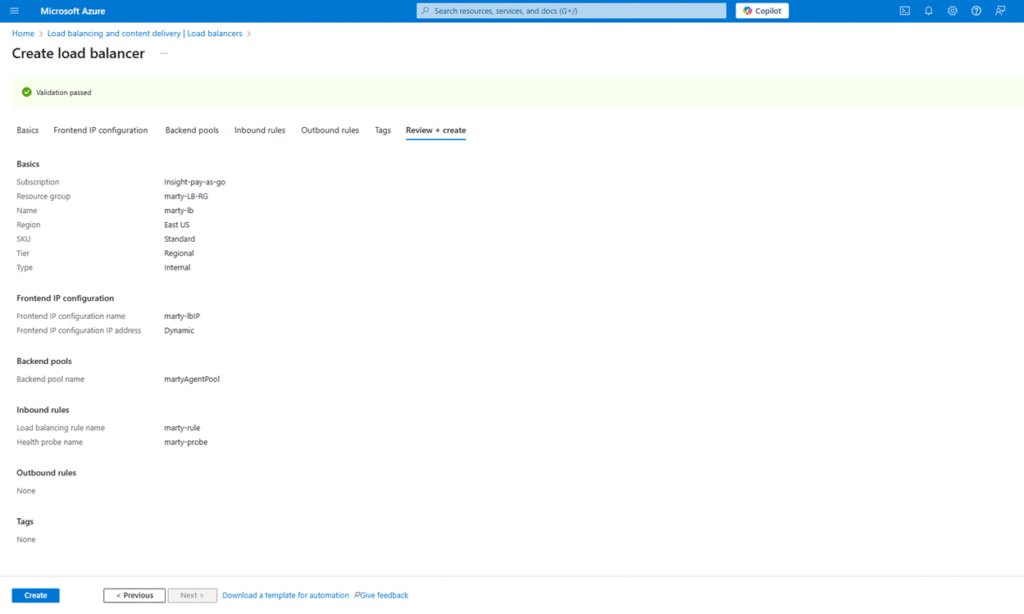
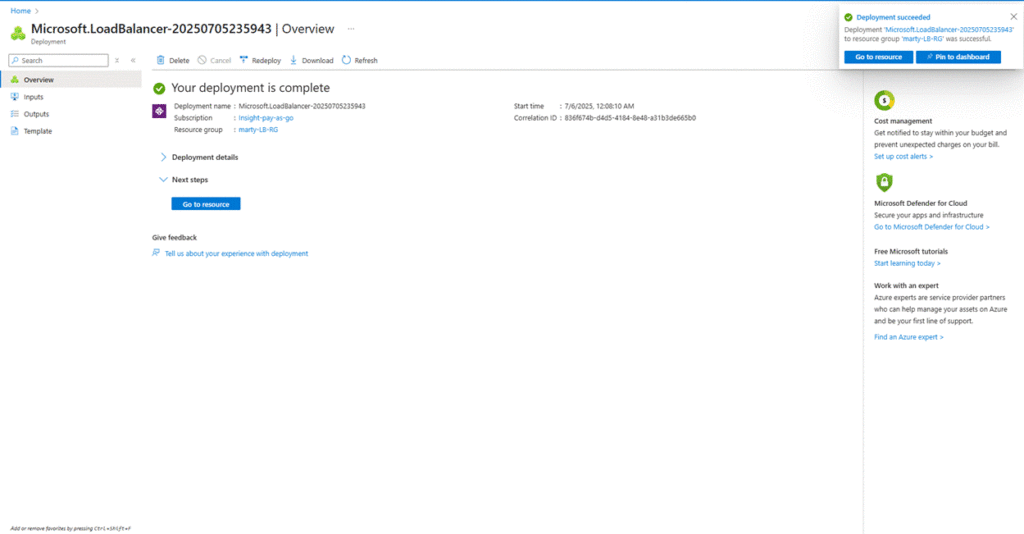
7. Review and create
Go to the Review + create tab:
- Ensure validation is successful.
- Click the “Create” button to deploy the Load Balancer.
#Migration #CloudMigration #Azure #M365Migration #EmailMigration